
Creating an AKS Release Pipeline in Azure DevOps
AKS and Kubernetes in general is still fairly new to me, but its something I am using more and more every day. One of the challenges I have faced is that the more I have to deploy to is, is the need for a simple way to deploy a set of apps you need on every cluster, that doesn’t involve a complicated solution. I am an ‘Ops’ guy by trade so creating release artifacts and NuGet packages doesn’t come naturally too me. Instead I like to keep things as simple as possible, and one way I have found to do this is using Release Pipelines in Azure DevOps in a GitOps style process, so this is what I’ll explain below.
Create some AKS Clusters
You are going to need a few clusters for this. I currently have 12 I need to run this on across multiple regions and environments, but for this demo, lets stick to 3 clusters which we can call, dev, stage and prod.
To quick create some you can run the following Azure CLI.
You can also find the script and all the YAML Kubernetes files for this blog here on my GitHub
SUBSCRIPTION="your-subscription-name"
RSG_NAME="aks-release-demo"
LOCATION="australiaeast"

az account set --subscription $SUBSCRIPTION

az group create --name $RSG_NAME --location $LOCATION

az aks create --name "prod-cluster" --resource-group $RSG_NAME --location $LOCATION --node-count 1 --enable-addons monitoring --generate-ssh-keys

az aks create --name "stage-cluster" --resource-group $RSG_NAME --location $LOCATION --node-count 1 --enable-addons monitoring --generate-ssh-keys

az aks create --name "dev-cluster" --resource-group $RSG_NAME --location $LOCATION --node-count 1 --enable-addons monitoring --generate-ssh-keys
Give that 10-20 minutes and you’ll have 3x basic AKS clusters ready to use.
Azure DevOps Service Connections
A Service Connection in Azure DevOps is a way to integrate with your third party services, like Kubernetes, GitHub, Jenkins etc.
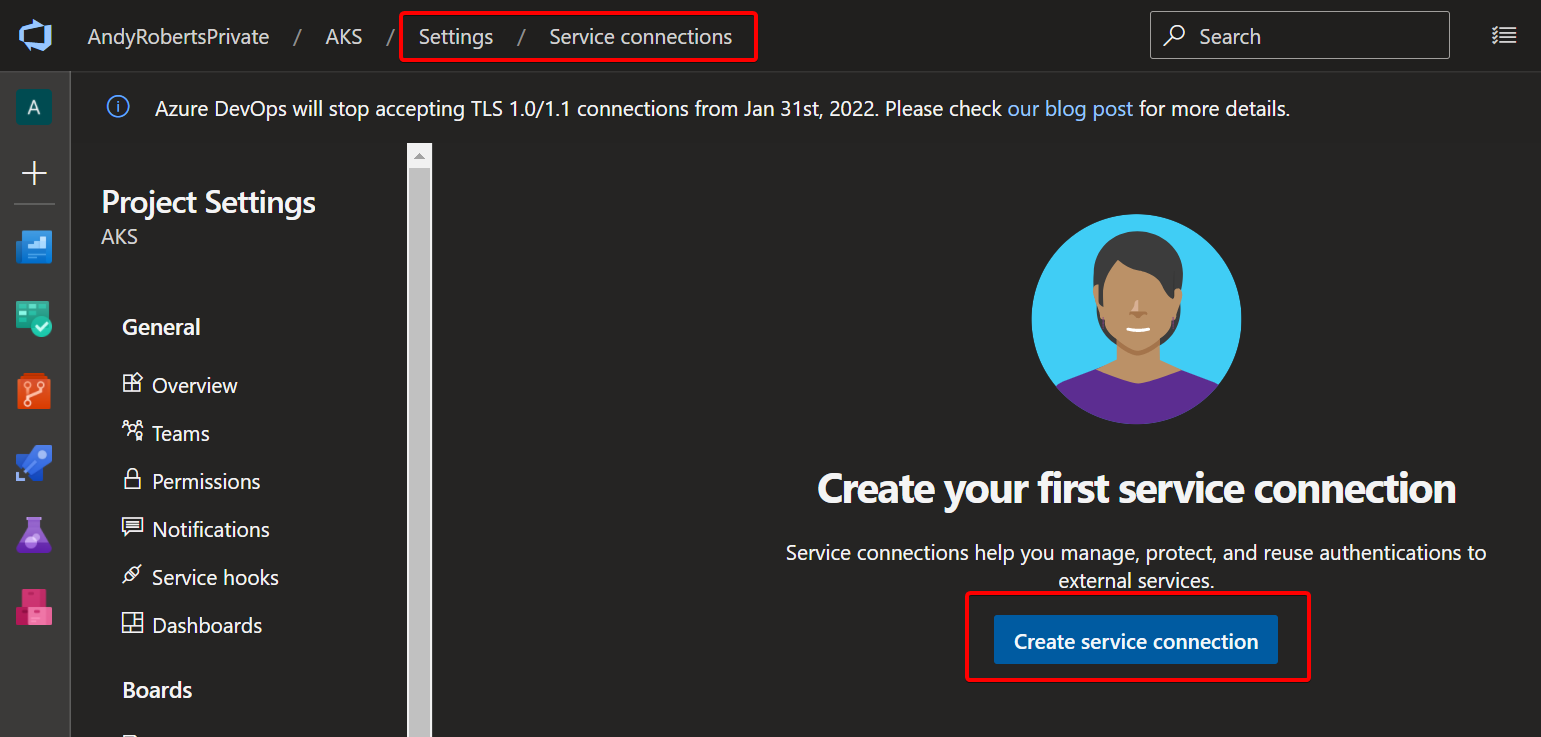
- Inside your Azure DevOps Project go to Settings and Service Connections and Create Service Connection
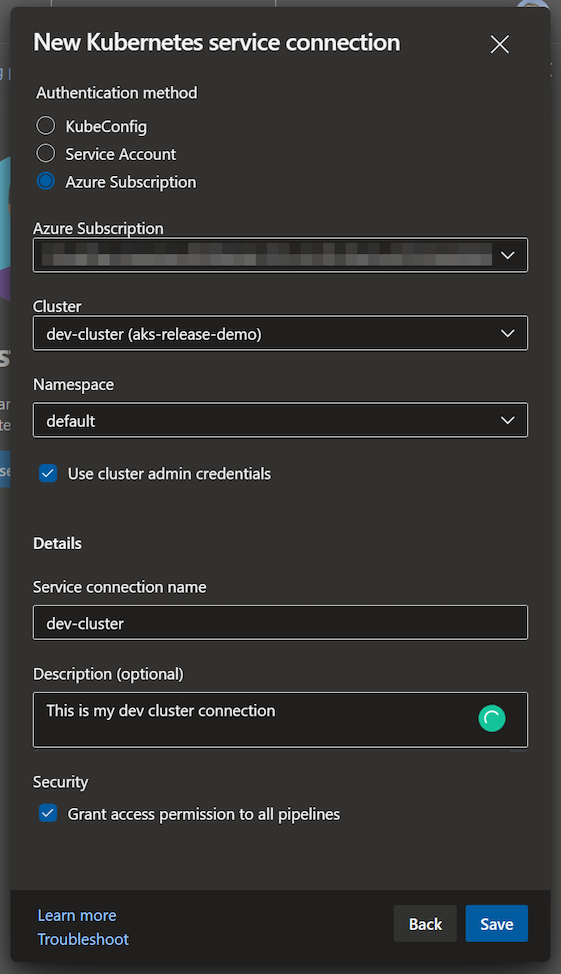
- Select Kubernetes and select Azure Subscription.
- From the dropdown pick your subscription where you deployed the AKS clusters, then select the first cluster, dev-cluster in this case.
- Namespace you can leave as default as we override this when deploying, but make sure that Use Cluster Admin Credentials is checked. If you don’t then you get errors with deploying to anything but the namespace you specify.
- Name the connection dev-cluster and grant access to all pipelines, and Save.
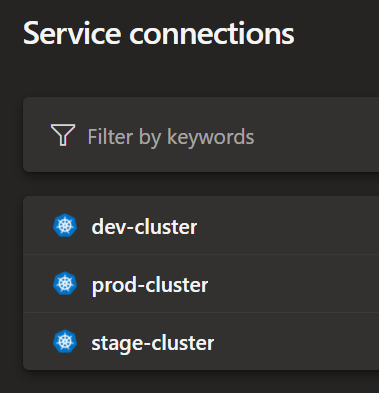
- Repeat the above for your stage and prod clusters, so you end up with 3 separate connections like this.
Create a Release Pipeline
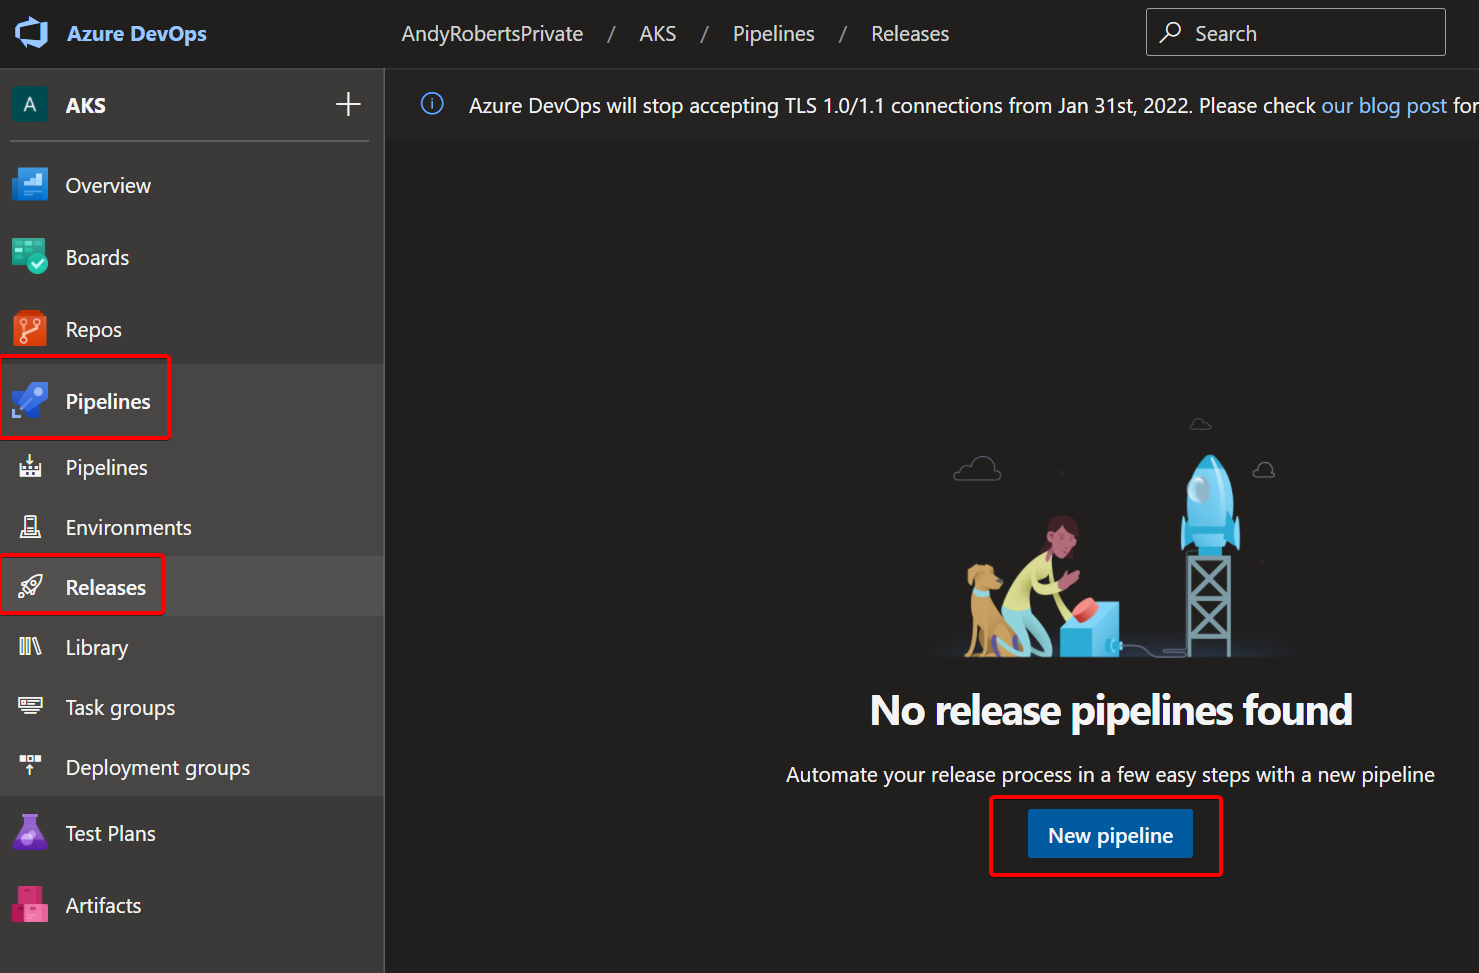
- From Pipelines / Releases, select New Pipeline
- Start with an Empty Job

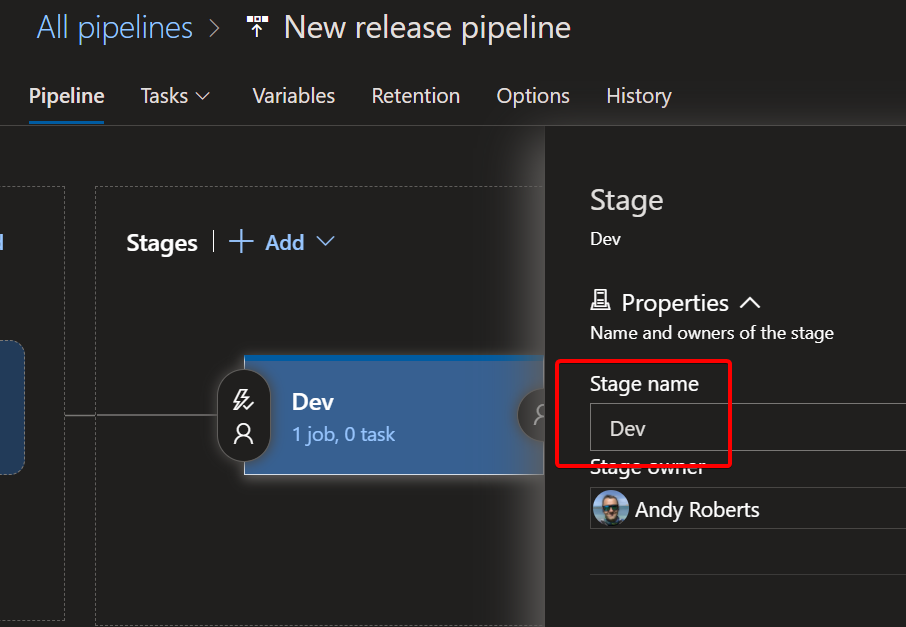
- You now create a Stage, so call the first one Dev
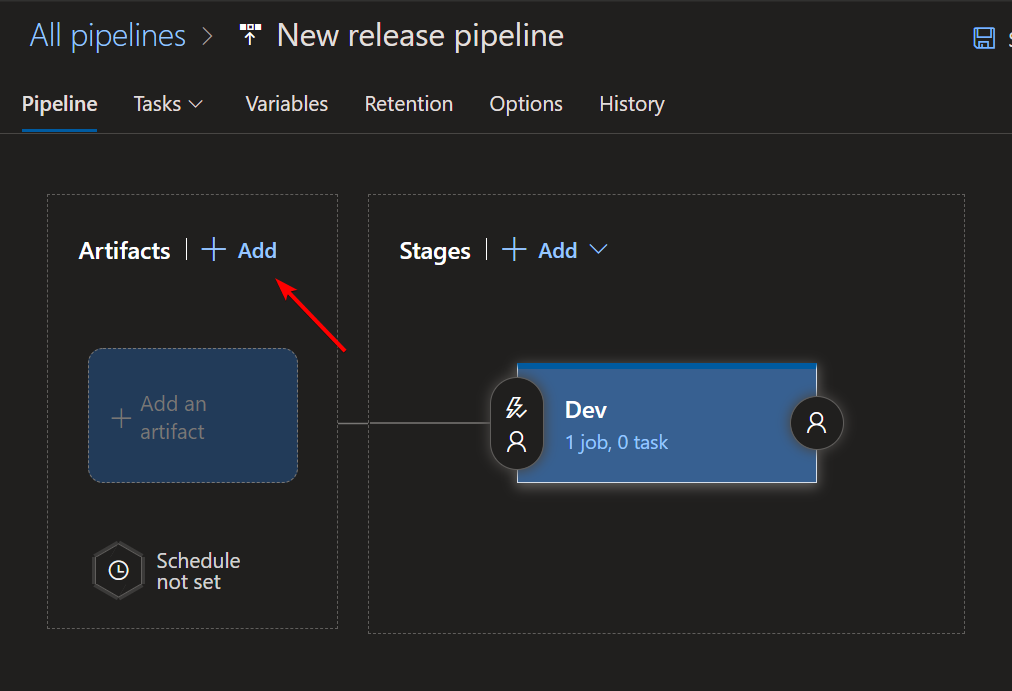
- Now to deploy anything you need some code. For this example I am just going to deploy some basic nginx and whoami apps that I have created some Kubernetes manifest files for. Select Add in the Artifact pane.
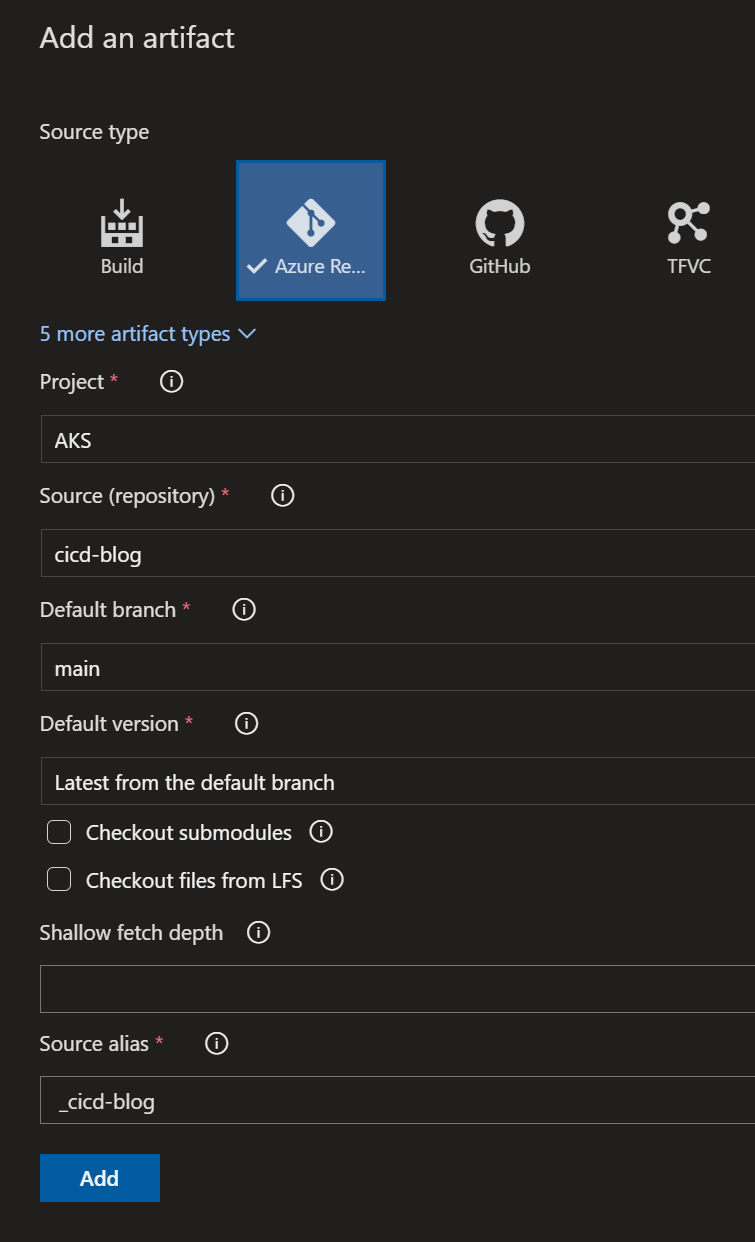
- My code is all in Azure DevOps for this demo, so I have selected my Project (AKS), Source Repo (cicd-blog) and the branch. If you are using GitHub or other this is totally fine, just fill out the relevant details. If you want to use the same files as me, you can grab them here on my GitHub
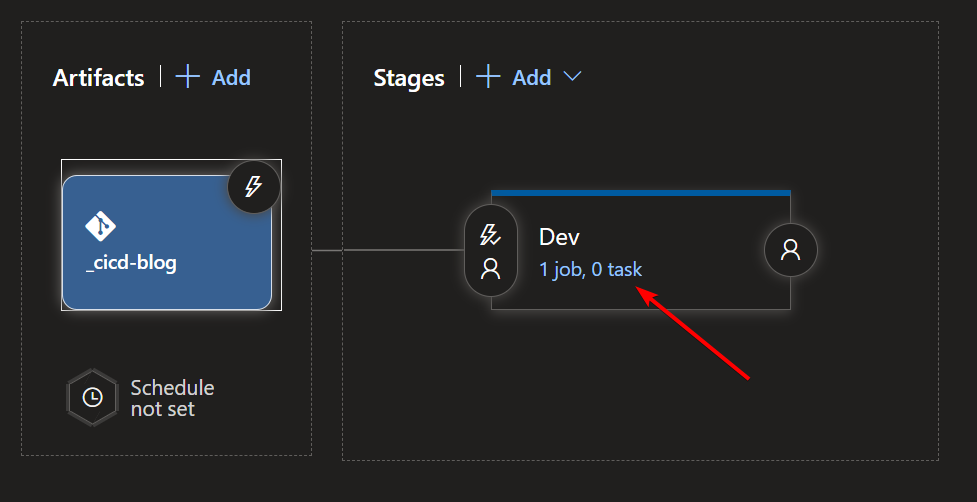
- Next you need to add a task, to tell the pipeline to do something, so select the task link.
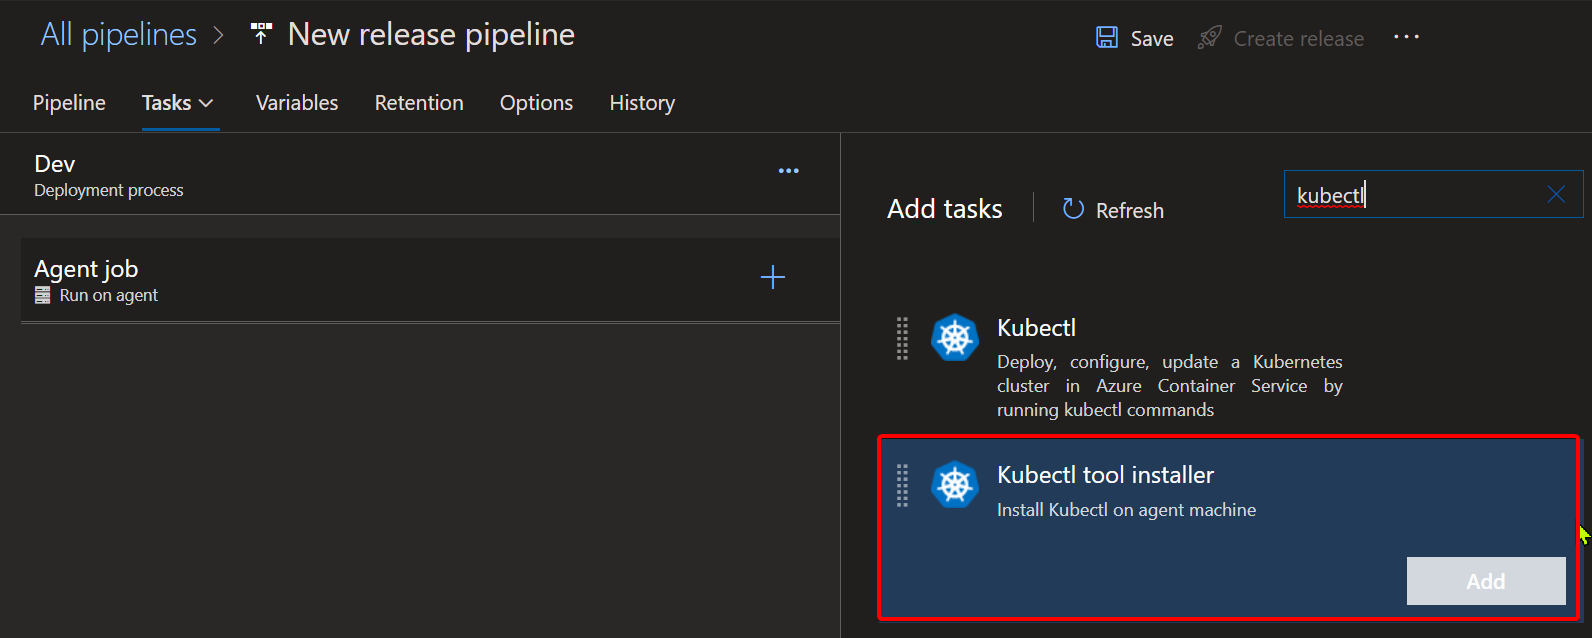
- A few things need to happen in this step, because you are going to be using build agents. The first of which is ensuring kubectl is installed so you can execute commands against the cluster. So search for kubectl in the Add Tasks pane and select Kubectl tool installer and Add that.
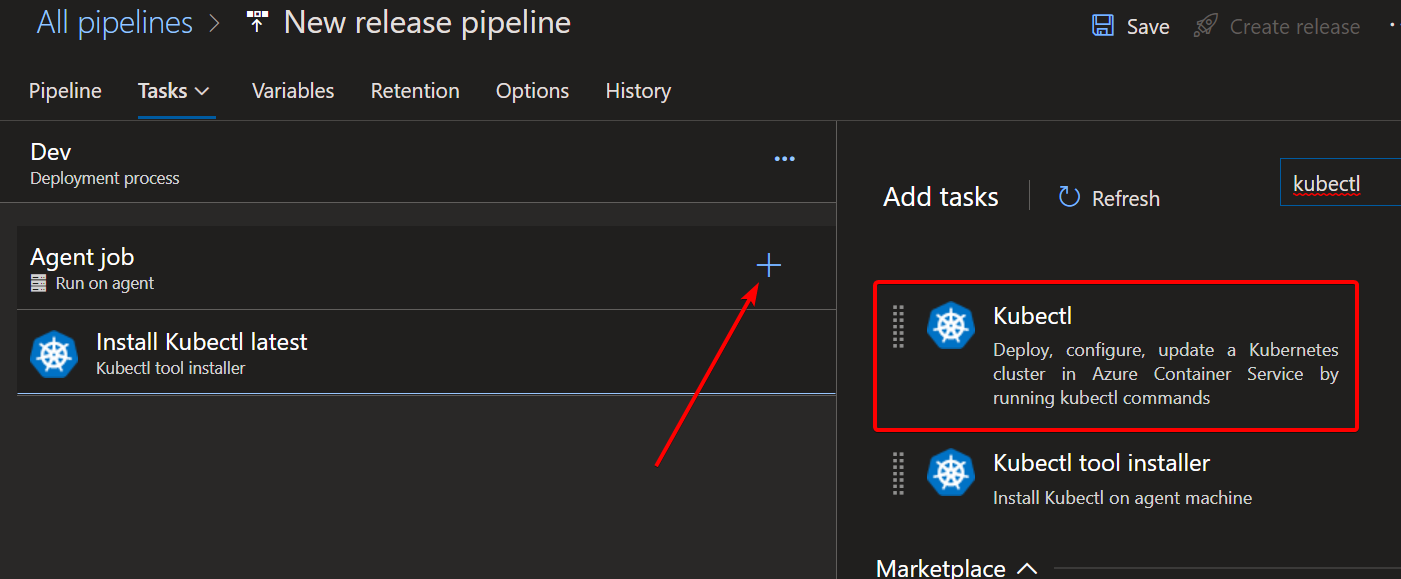
- Add another task and this time just select Kubectl and Add.
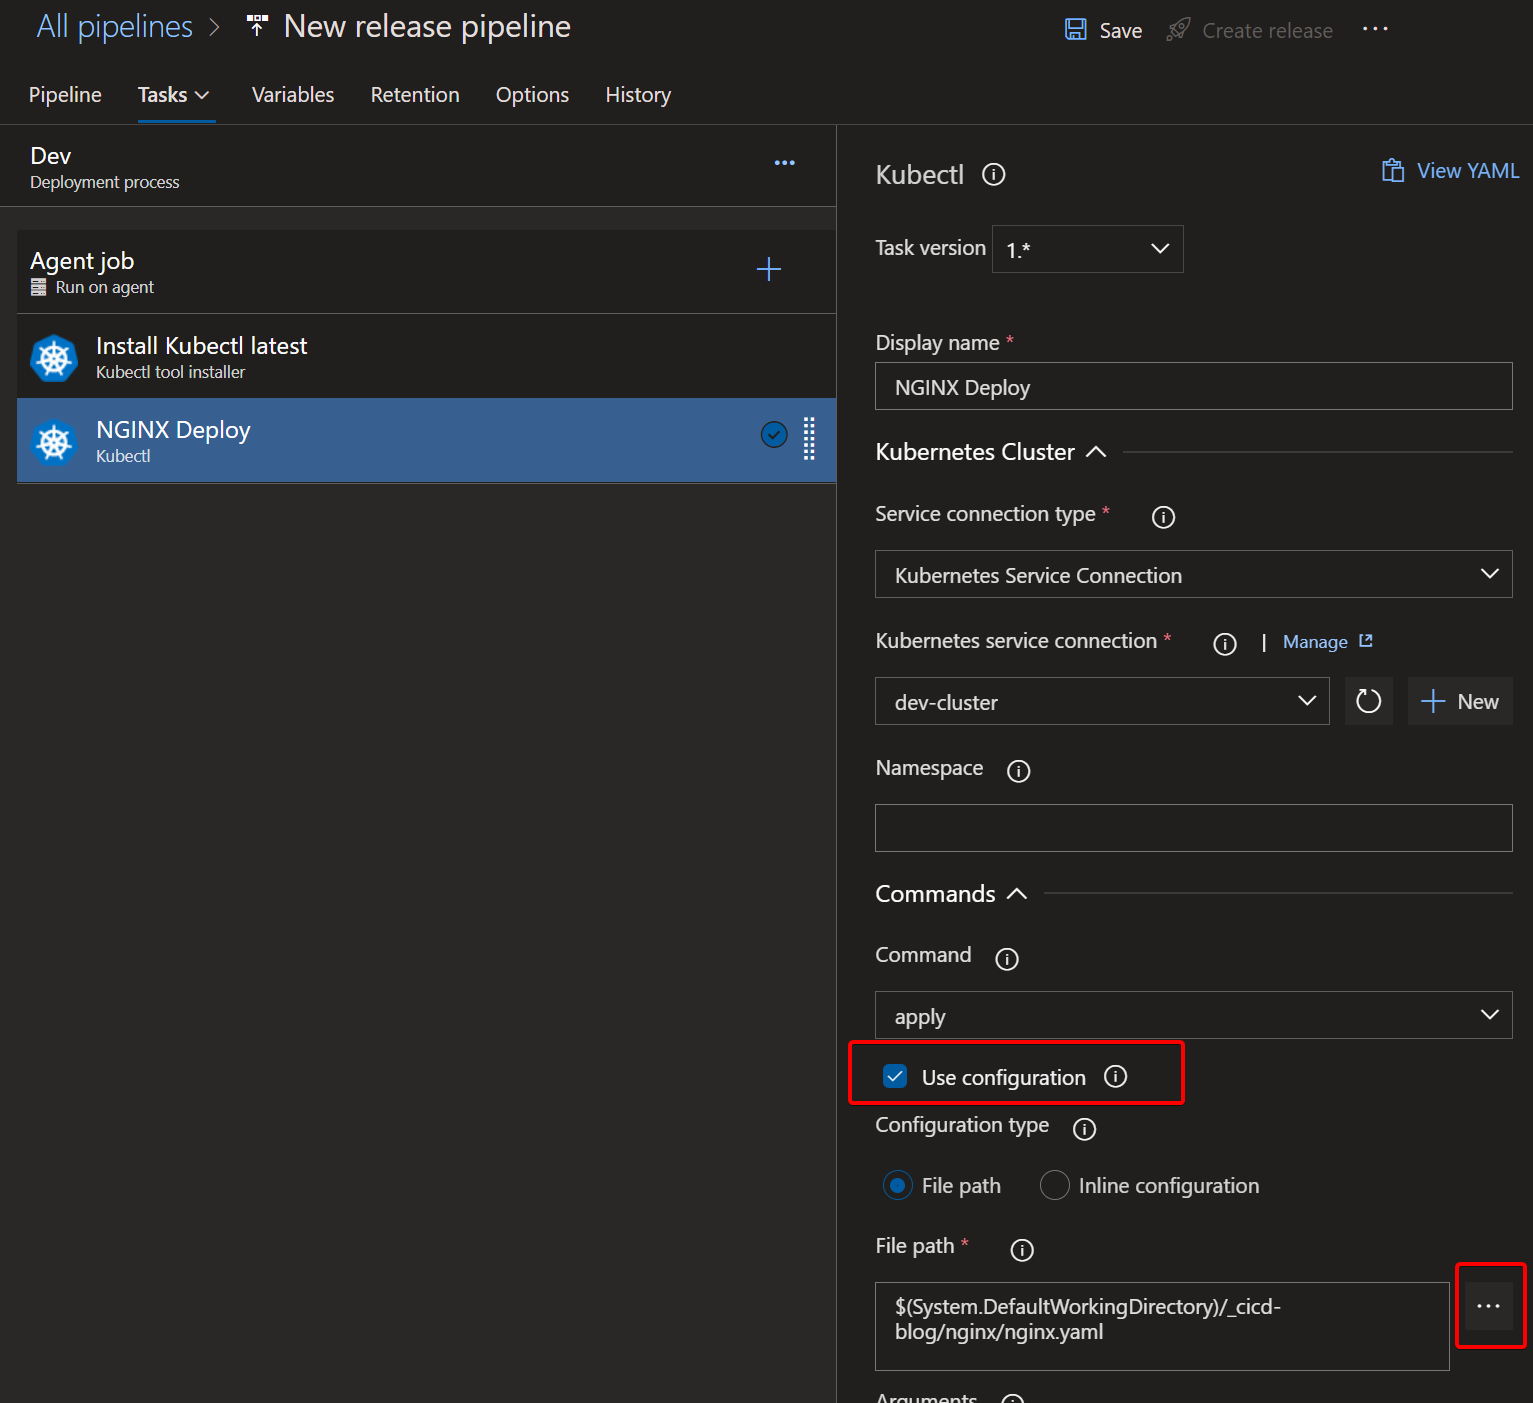
- This is where you configure the meat of the deployment.
- Give your deployment a name (NGINX Deploy)
- Select your Kubernetes Service Connection you created earlier and chose the dev-cluster
- Leave namespace blank, as this is created by the manifest file.
- For command, pick apply and then select Use Configuration. This will give us some extra options.
- File Path is what you want here and you can navigate through your repo to find the deployment file you want. If you have more than one file, you can select the entire folder if that helps.
- One thing I like to do as well, is change the Agent Job to use ubuntu-latest, as I find in my region (I live in NZ but use Australia East) that ubuntu starts up much faster than windows agents.
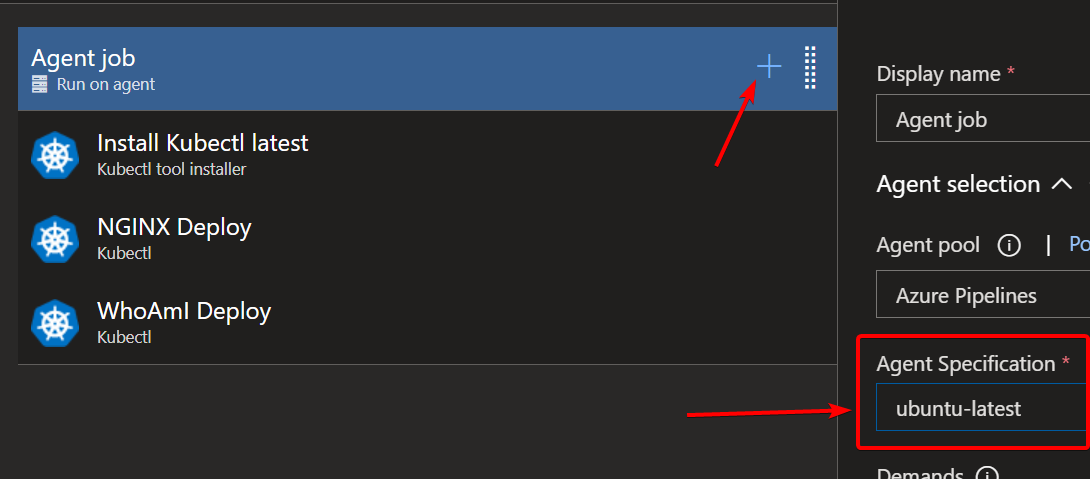
- At this stage you can add more deploy steps if you like. On the screenshot above I have created another WhoAmI deployment but this is totally optional.
- Save your Pipeline and then click Create Release

- At this point you only have 1 stage, so can just click Create

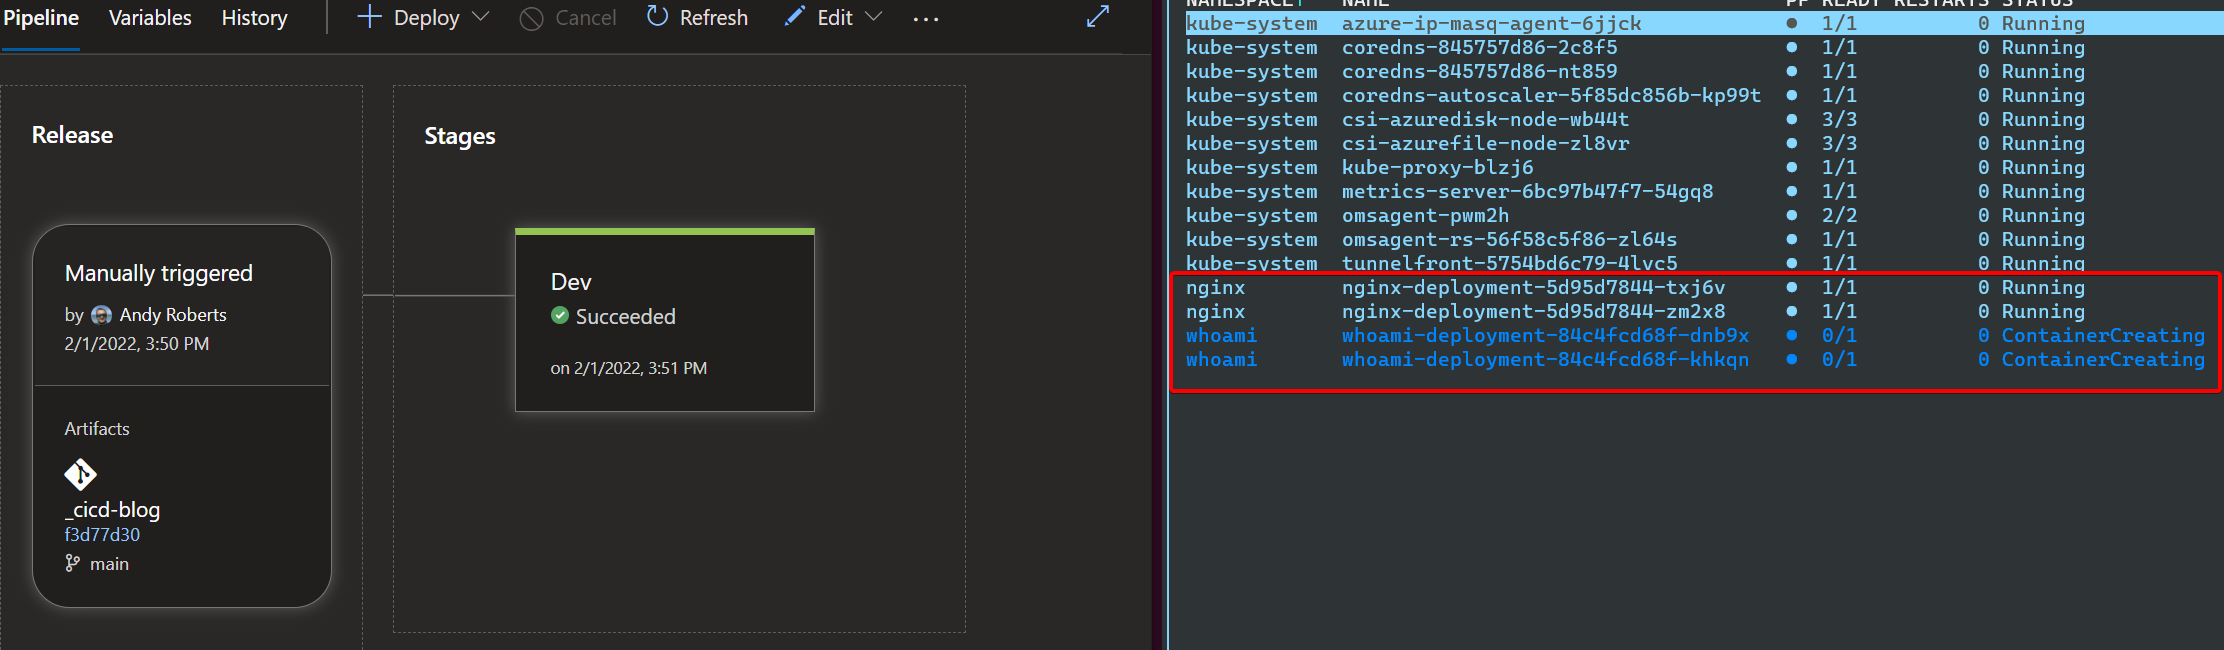
Everything happens quite quick at this point. The release will be processed so the pipeline pulls down the code you specified in the Artifacts section, then runs through your steps and deploys the manifest to the cluster. In my example this took around 20 seconds for the whole thing, and you can see below a completed release, and the nginx and whoami pods running on my Dev AKS Cluster!
Add More Stages for Stage and Prod
It wouldn’t be a release pipeline if you didn’t take the release through to Production, so lets do that :)
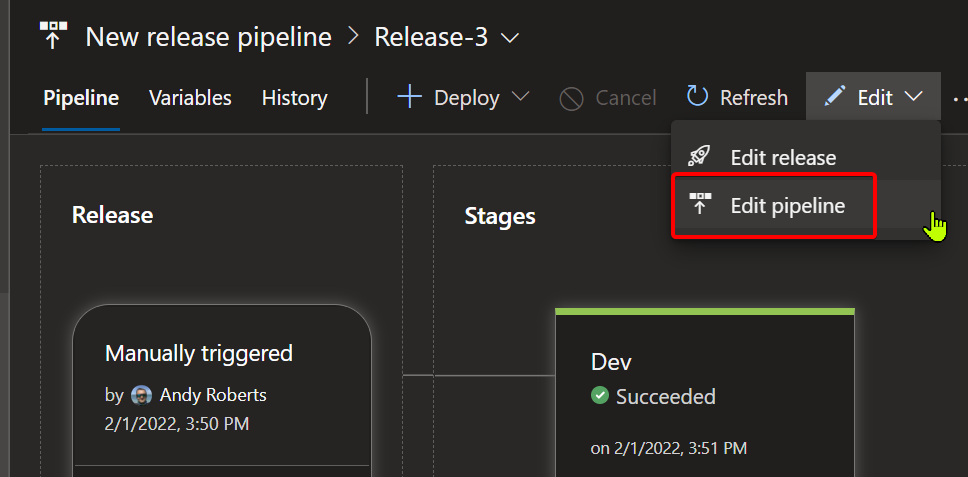
- Edit your Pipeline
- Click on the Clone button and this clones that stage to a fresh one.

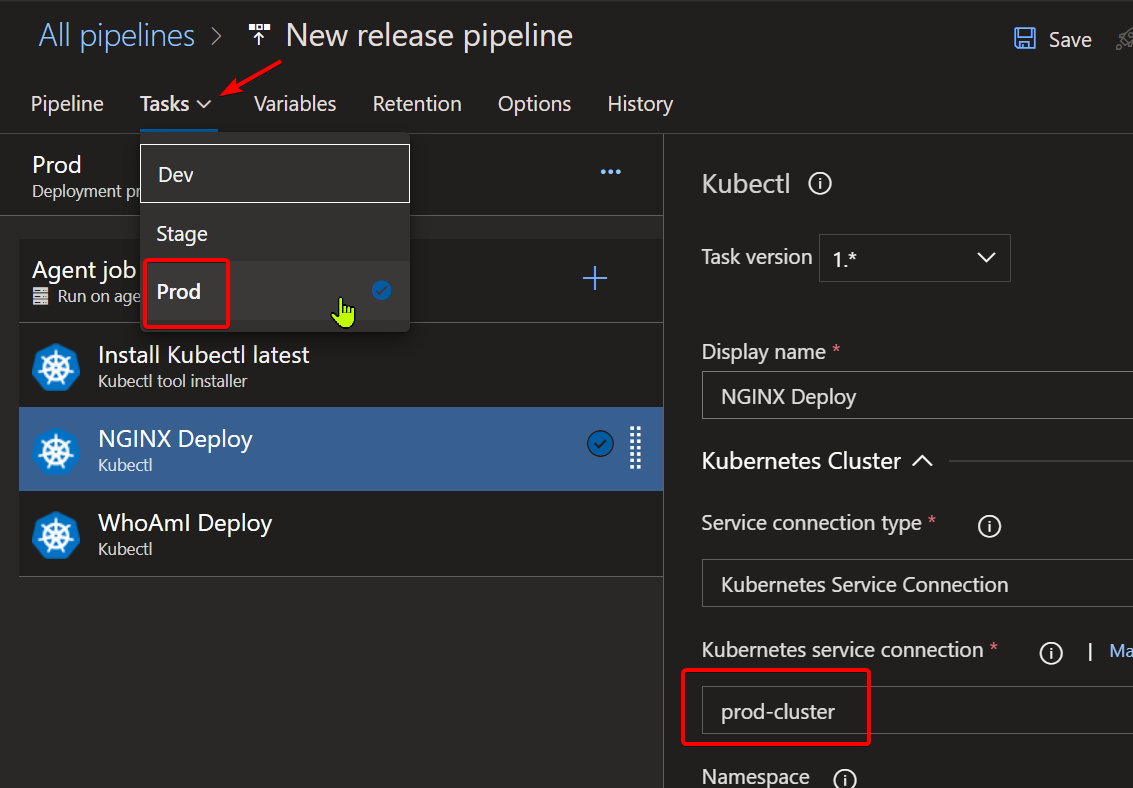
- Edit the task on the new stage and change the Service Connection on each stage from your dev-cluster to the stage-cluster. Also rename your cloned stage to Stage and then save.
- Repeat that for the prod-cluster stage so they look like below.
- Save the Pipeline and come back out so you can see all of your stages.
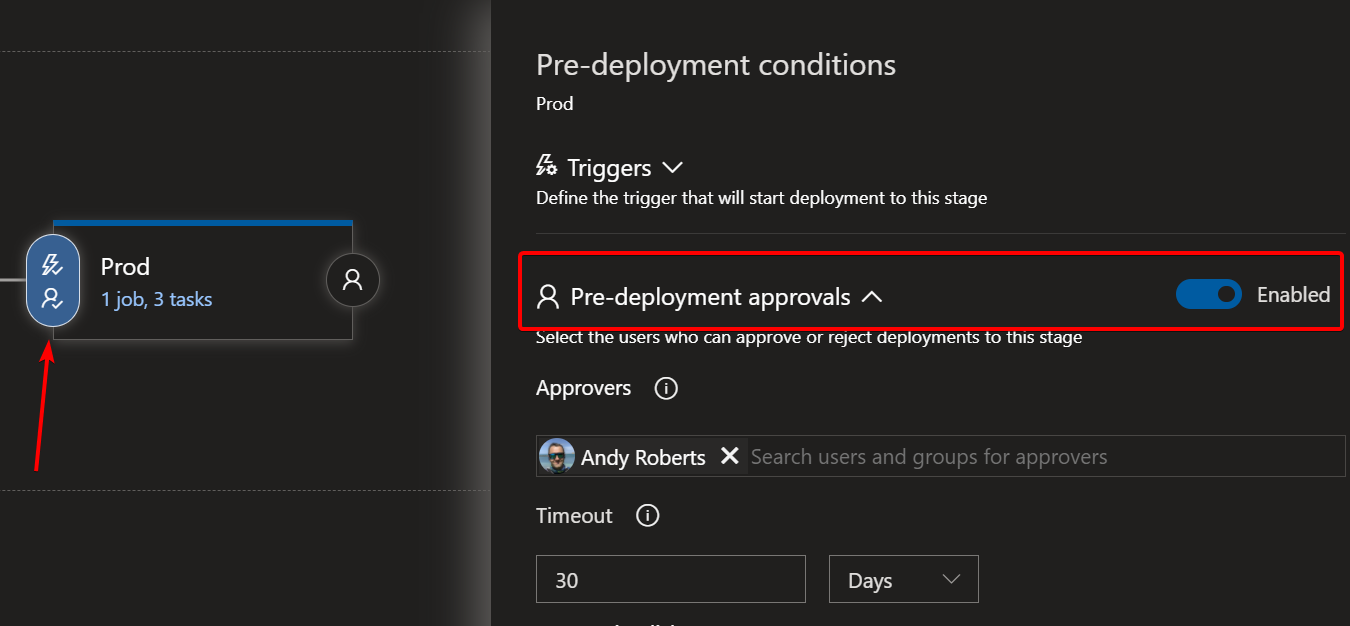
- Optional - You might want to have an approval for your Production stage, so for example you auto deploy to all None-Prod, but then want to pause for manual approval for Production, to avoid introducing a breaking change all the way through. To do this, click on the Pre Deployment Conditions icon at the start of the Prod Stage.
- Enable the Pre Deployment Approvals and put yourself as the approver. In real production you would have others, but this works for this demo.
- Save the pipeline and create a new release.
Seeing it all in motion
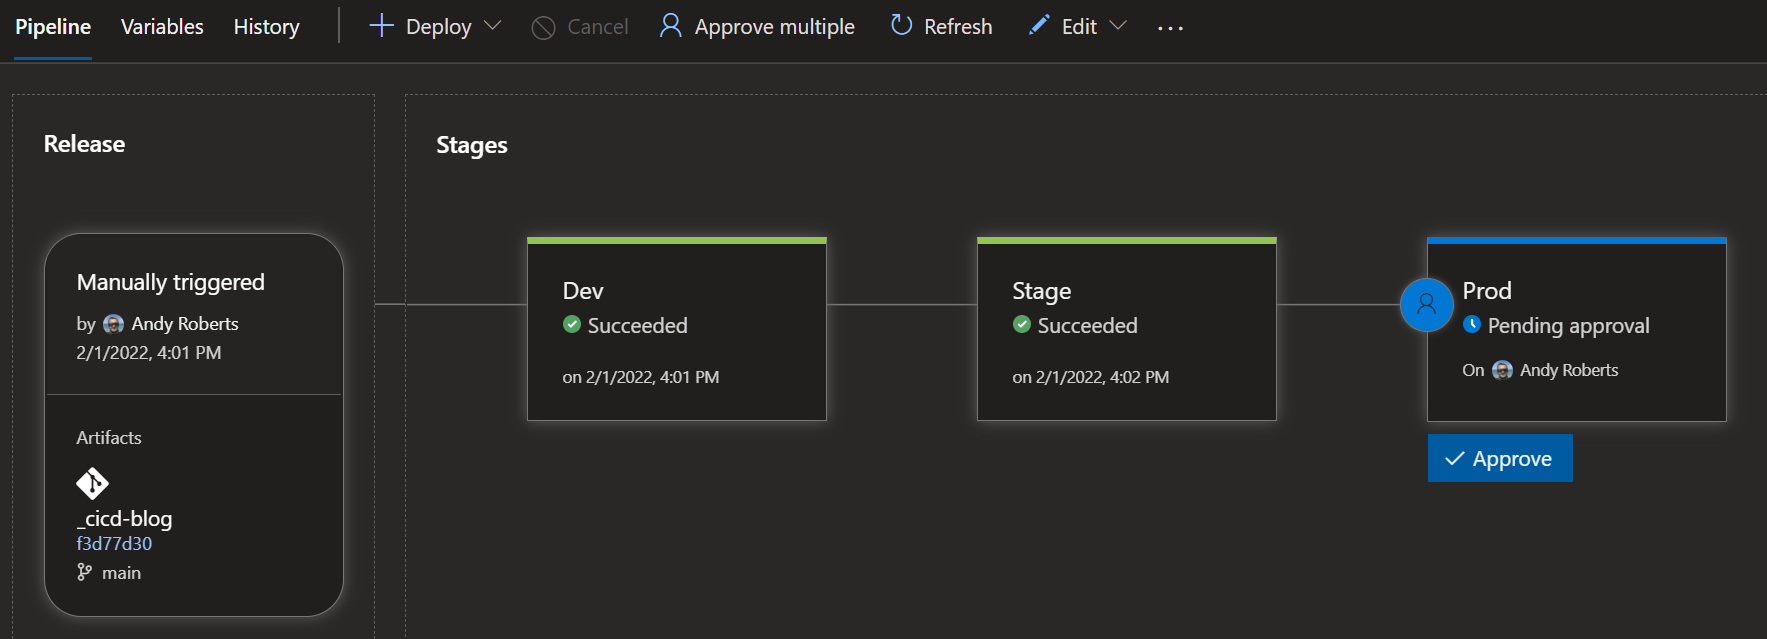
This all happens quite quickly if you only have a really simple webapp to deploy, like I am doing for this demo. But once you create the release you will see the process flow through, deploying first to the dev-cluster, then to stage-cluster and finally pausing before it goes to the prod-cluster.
That’s it. Congratulations, you have created a release pipeline with continuous integration, so now whenever you make a commit on the main branch you specified in the artifacts section, the release pipeline will run and apply all those manifests. If there are no changes, then kubectl will see that and not change anything. If there are changes, it will apply them, to always match you code base, which is the basis of a GitOps flow like this.
I hope this has helped as a simple overview to release pipelines with AKS.
Andy