
HTTPS to AKS with Traefik and Lets Encrypt
I’ll preface this blog post with the fact that I am FAR FAR away from any kind of expert on Kubernetes and AKS. I am still very early in my journey with it, and a lot of my experience so far is trial and error. I have also found that there is a lot of documentation out there on how to do things, but a lot of it assumes a fairly decent knowledge of how everything sticks together, so for a newbie to Kubernetes it can be quite challenging.
So recently while working on some solutions at work, I had a need to test out some HTTPS ingress into an Azure Kubernetes (AKS) instance. The most logical and easiest way to do this is with the Azure Application Gateway Ingress Controller (AGIC). Honestly this is an amazing service from Azure and makes everything super easy, and for production instances I would highly recommend this. But for this project, the ingress being used was Traefik and the requirement was to use automatically generated certificates from Lets Encrypt.
This is a fully support solution on Traefik, so once I spent a few hours reading, along with trial and error, it was actually pretty simple. So I have tried to condense the steps down here to what I did. to get it working.
Note - All the files I use for this are available in my GitHub Repo if you want to download and use instead of copy/paste.
Setup an AKS Cluster
You could use any deployment of Kubernetes for this, AKS, EKS, GKE or Minikube. They should all work, but for me I’m using Azure so this is based around AKS. So first of all lets setup a quick single node AKS Cluster, which I’m going to call Ironman.
# Login in Azure
az login
# Create some variables
rsg="aks-traefik"
location="australiaeast"
aksname="ironman"

# Create a resource group
az group create --name $rsg --location $location

# Create an AKS cluster
az aks create --resource-group $rsg --name $aksname --node-count 1 --enable-addons monitoring --generate-ssh-keys

# Get the AKS credentials to use in my local kubeconfig
az aks get-credentials --resource-group $rsg --name $aksname
Install Traefik
Now your cluster is setup and working we need to install Traefik. By far the easiest way to do this is with the Helm Chart that Traefik provide. I am assuming here you have Helm setup but if you haven’t there are excellent steps here for installing Helm.
# Add the Traefik Repo
helm repo add traefik https://helm.traefik.io/traefik
# Update Helm
helm repo update
# Install Traefik to your cluster
helm install traefik traefik/traefik
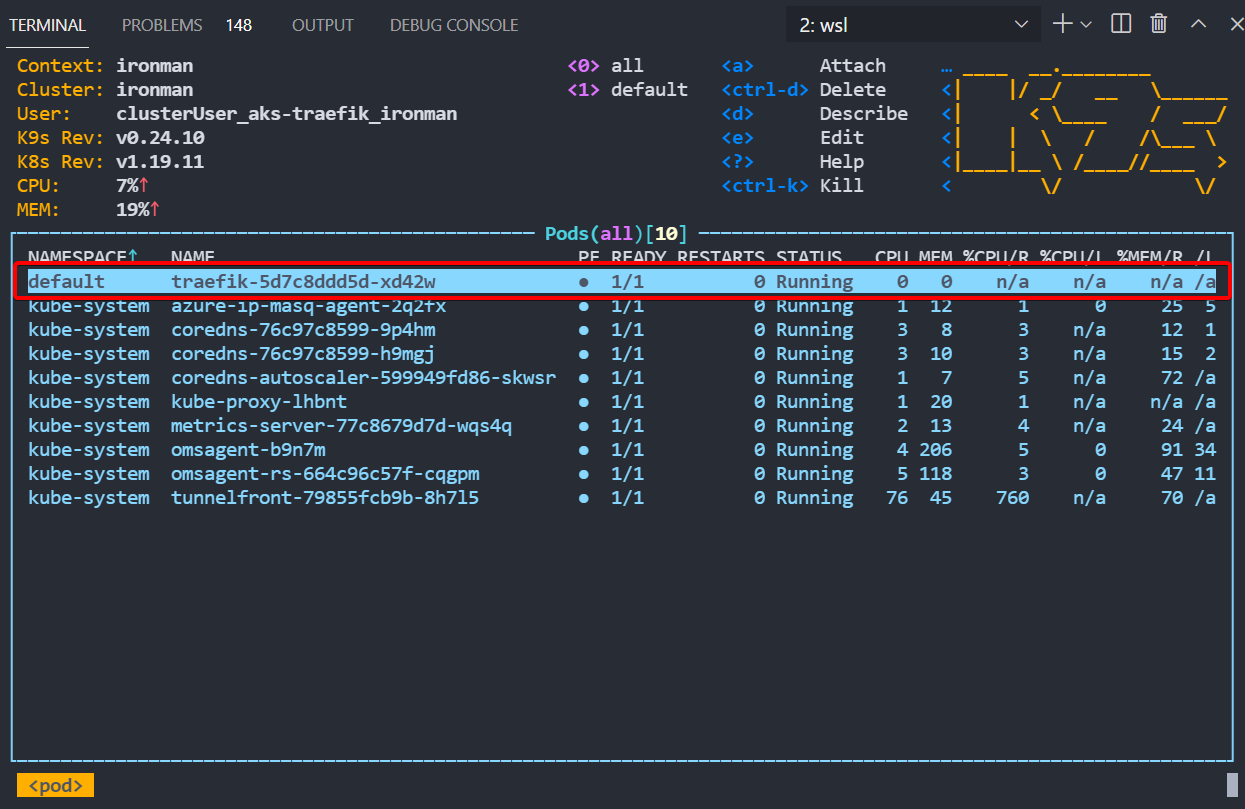
As long as that all goes through you should have Traefik installed in your cluster, which for me using K9S to view showed it all ready to go.
Install a Demo App
Obviously you need somewhere to send traffic to for this demo. You can use anything, but for quick web frontend demos I am a big fan of the Containous Whoami docker image. Its nice and lightweight and gives a lot of good info when you are testing web traffic flows.
To deploy it create a yaml file using whatever editor you use (its VSCode right?) with the below. As mentioned earlier, you can also find all these files in my GitHub repo.
Save the file as 001-app.yaml
---
kind: Deployment
apiVersion: apps/v1
metadata:
  namespace: default
  name: whoami
  labels:
    app: whoami
spec:
  replicas: 1
  selector:
    matchLabels:
      app: whoami
  template:
    metadata:
      labels:
        app: whoami
    spec:
      containers:
      - name: whoami-container
        image: containous/whoami
        ports:
          - name: web
            containerPort: 80
Once you have done that deploy it to your cluster
kubectl apply -f 001-app.yaml
Service for the App
Next step is to create a simple service for the App to route traffic inside of the cluster.
Save this file as 002-service.yaml.
---
kind: Service
apiVersion: v1
metadata:
  name: whoami

spec:
  type: ClusterIP
  ports:
  - protocol: TCP
    port: 80
    name: web
  selector:
    app: whoami
And then deploy it
kubectl apply -f 002-service.yaml
External DNS Configuration
At this stage we have Traefik installed but not doing anything, as well as a demo app and local service. Next you need to point an external DNS name to your cluster ingress. This will depend entirely on your DNS provider, but for me I use Cloudflare with a cheap .xyz domain for test. Run the below command and take the external-ip of your traefik ingress and use that IP for your DNS name.
kubectl get service
Setup Certificate Manager
To generate Lets Encrypt Certificates we need to use a Certificate Manager and the one I saw come up the most and had the most easy to understand documentation was Cert Manager.
To install it execute the following which is the latest stable version at the date of blog.
kubectl apply -f https://github.com/jetstack/cert-manager/releases/download/v1.3.1/cert-manager.yaml
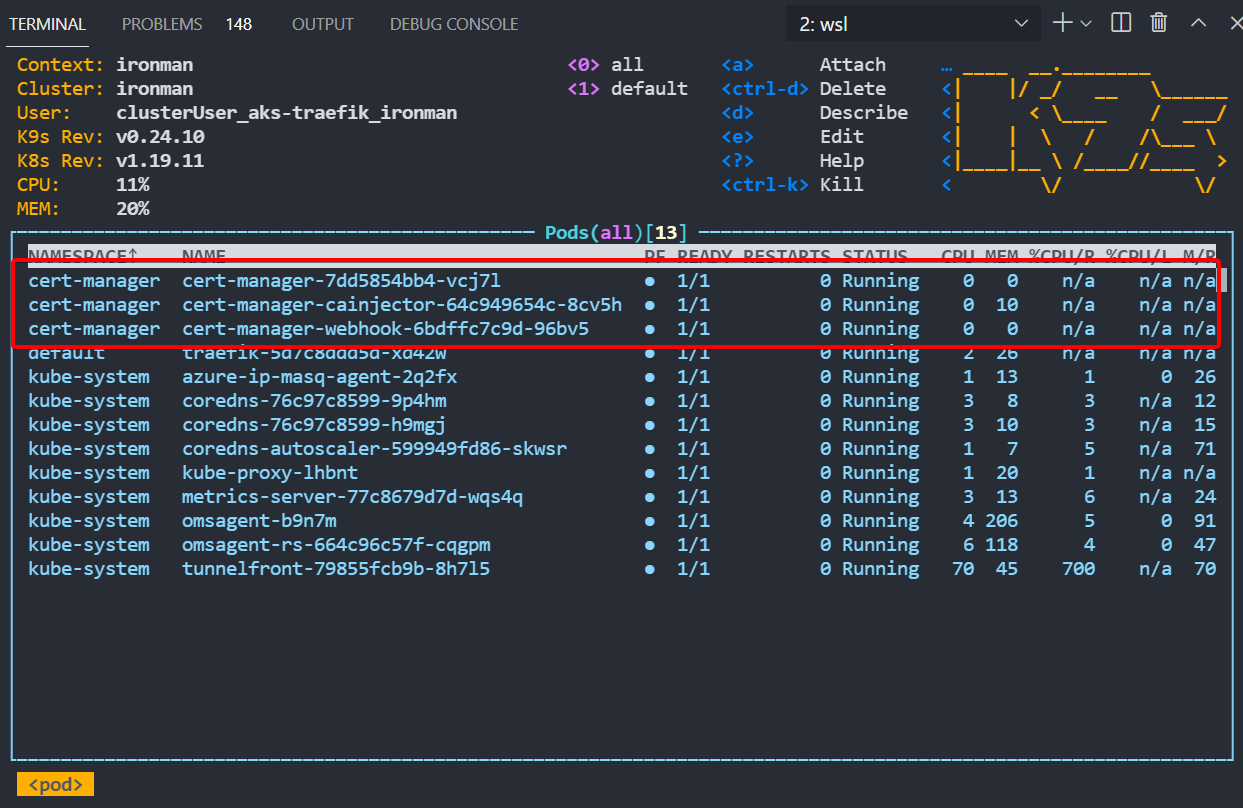
This installs pretty quick and you can see when its ready as a few pods will show up like this.
Setup Lets Encrypt
Now we get to the meaty part of the cert creation. There are a couple of steps to this, the first being to configure the cluster issuer to use Let Encrypt. You can use the below manifest file, just change your email address and name of the secret to something you want to use. Save the file as 003-lets-encrypt.yaml.
---
apiVersion: cert-manager.io/v1
kind: ClusterIssuer
metadata:
  name: whoami-cert # CHANGE THIS NAME
  namespace: default
spec:
  acme:
    server: https://acme-v02.api.letsencrypt.org/directory
    email: [email protected] # CHANGE TO YOUR EMAIL
    privateKeySecretRef:
      name: whoami-cert # CHANGE THIS NAME TO MATCH THE METADATA
    solvers:
    - http01:
        ingress:
          class: traefik
Then apply it
kubectl apply -f 003-lets-encrypt.yaml
Next you will do the actual certificate creation part. You will reference the issuer name from the previous step, but the other parts you need are the public DNS name of what you need the certificate to work with. Again you can use the below manifest for this part, call it 004-lets-encrypt-cert.yaml and change the settings to reflect your domain and names.
---
apiVersion: cert-manager.io/v1
kind: Certificate
metadata:
  name: aks.mydomain.xyz # This should be your domain name
  namespace: default
spec:
  secretName: aks.mydomain.xyz-tls # This will be your cert name in Kubernetes
  issuerRef:
    name: whoami-cert # This should match from 003-lets-encrypt.yaml
    kind: ClusterIssuer
  commonName: aks.mydomain.xyz # This is the main DNS name for the cert
  dnsNames:
  - aks.mydomain.xyz # You can add subdomains if you wish
Then apply it
kubectl apply -f 004-lets-encrypt-cert.yaml
Once that is done it can take a few minutes to create the cert. If you run kubectl get certificate you can see it being created, just wait for it to changed to TRUE as a Ready State. In my tests it takes about 2-3 minutes to fully come up. If its longer than that you have probably made a mistake in the yaml, so running kubectl describe certificate will show you the logs of whats happening. Mine looked like this when it was ready.

Ingress Route to the App
Final step, lets tell Traefik to find your app. This is done using an IngressRoute definition, and as long as your certificate has created OK, your DNS is pointed to your Traefik public IP, and you change all the values to reflect your certificate name and DNS names, the below manifest should do the trick. Save it as 005-ingress-route-https.yaml.
---
kind: IngressRoute
apiVersion: traefik.containo.us/v1alpha1
metadata:
  name: whoami
  namespace: default
  annotations: # If you are using local certs and not lets Encrypt - Remove this
    kubernetes.io/ingress.class: traefik  # If you are using local certs and not lets Encrypt - Remove this
    cert-manager.io/cluster-issuer: whoami-cert  # If you are using local certs and not lets Encrypt - Remove this

spec:
  entryPoints:
    - websecure
  tls:
    secretName: aks.mydomain.xyz-tls # Lets Encrypt Generated Cert from 004-lets-encrypt-cert.yaml - Change this to local cert if you don't want to use Lets Encrypt.
    domains:
    - main: aks.mydomain.xyz
      sans:
      - aks.mydomain.xyz

  routes:
  - match: Host(`aks.mydomain.xyz`)
    kind: Rule
    services:
    - name: whoami
      port: 80
And apply the ingressroute manifest.
kubectl apply -f 005-ingress-route-https.yaml
Fingers Crossed…..
Time to see if this worked. Open a browser and go to your domain name you setup earlier, mine for this test was https://ironman.andyroberts.xyz (won’t work for you), and see if the app loads….
The SSL cert should be valid, include your domain name and be issued by R3 which is Lets Encrypt.
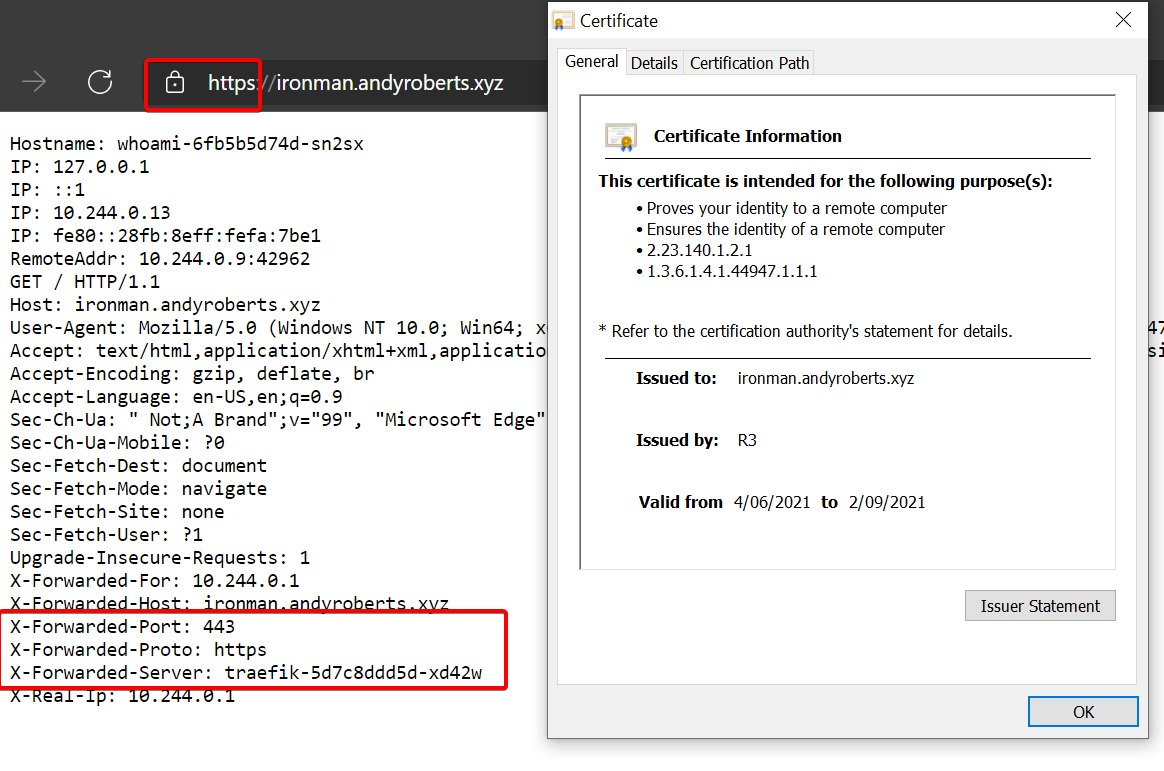
Congratulations!!!! You did it, a nice simple HTTPs ingress to AKS via Traefik with auto generated SSL certificates.
Now I wouldn’t use this in production personally, I normally prefer full purchased certificates as there are a myriad of reasons to do that, but that all depends on your individual needs. For many this could be all you need and I hope this has been helpful.
Bonus - Using a full purchased SSL Cert
Like I said just, you may not want to use a dynamic Lets Encrypt cert. If you already have a full SSL cert, probably a wildcard for your site, its actually super easy to do this. I don’t know if this is production ready but it was fine for me in quick testing so if its not please let me know.
Take your existing cert and upload it into Kubernetes as a secret
kubectl create secret tls mysecretname --key mycert.key --cert mycert.crt
Then in the 005-ingress-route-https.yaml change the tls secretName to be the name of your new local secret, which above is mysecret.
Hope that helps! Have fun!
Andy